Add DataFast to your WordPress site
Follow these steps to integrate DataFast analytics into your WordPress site.
Method 1: Using the DataFast plugin (Recommended)
- Log in to your WordPress admin dashboard.
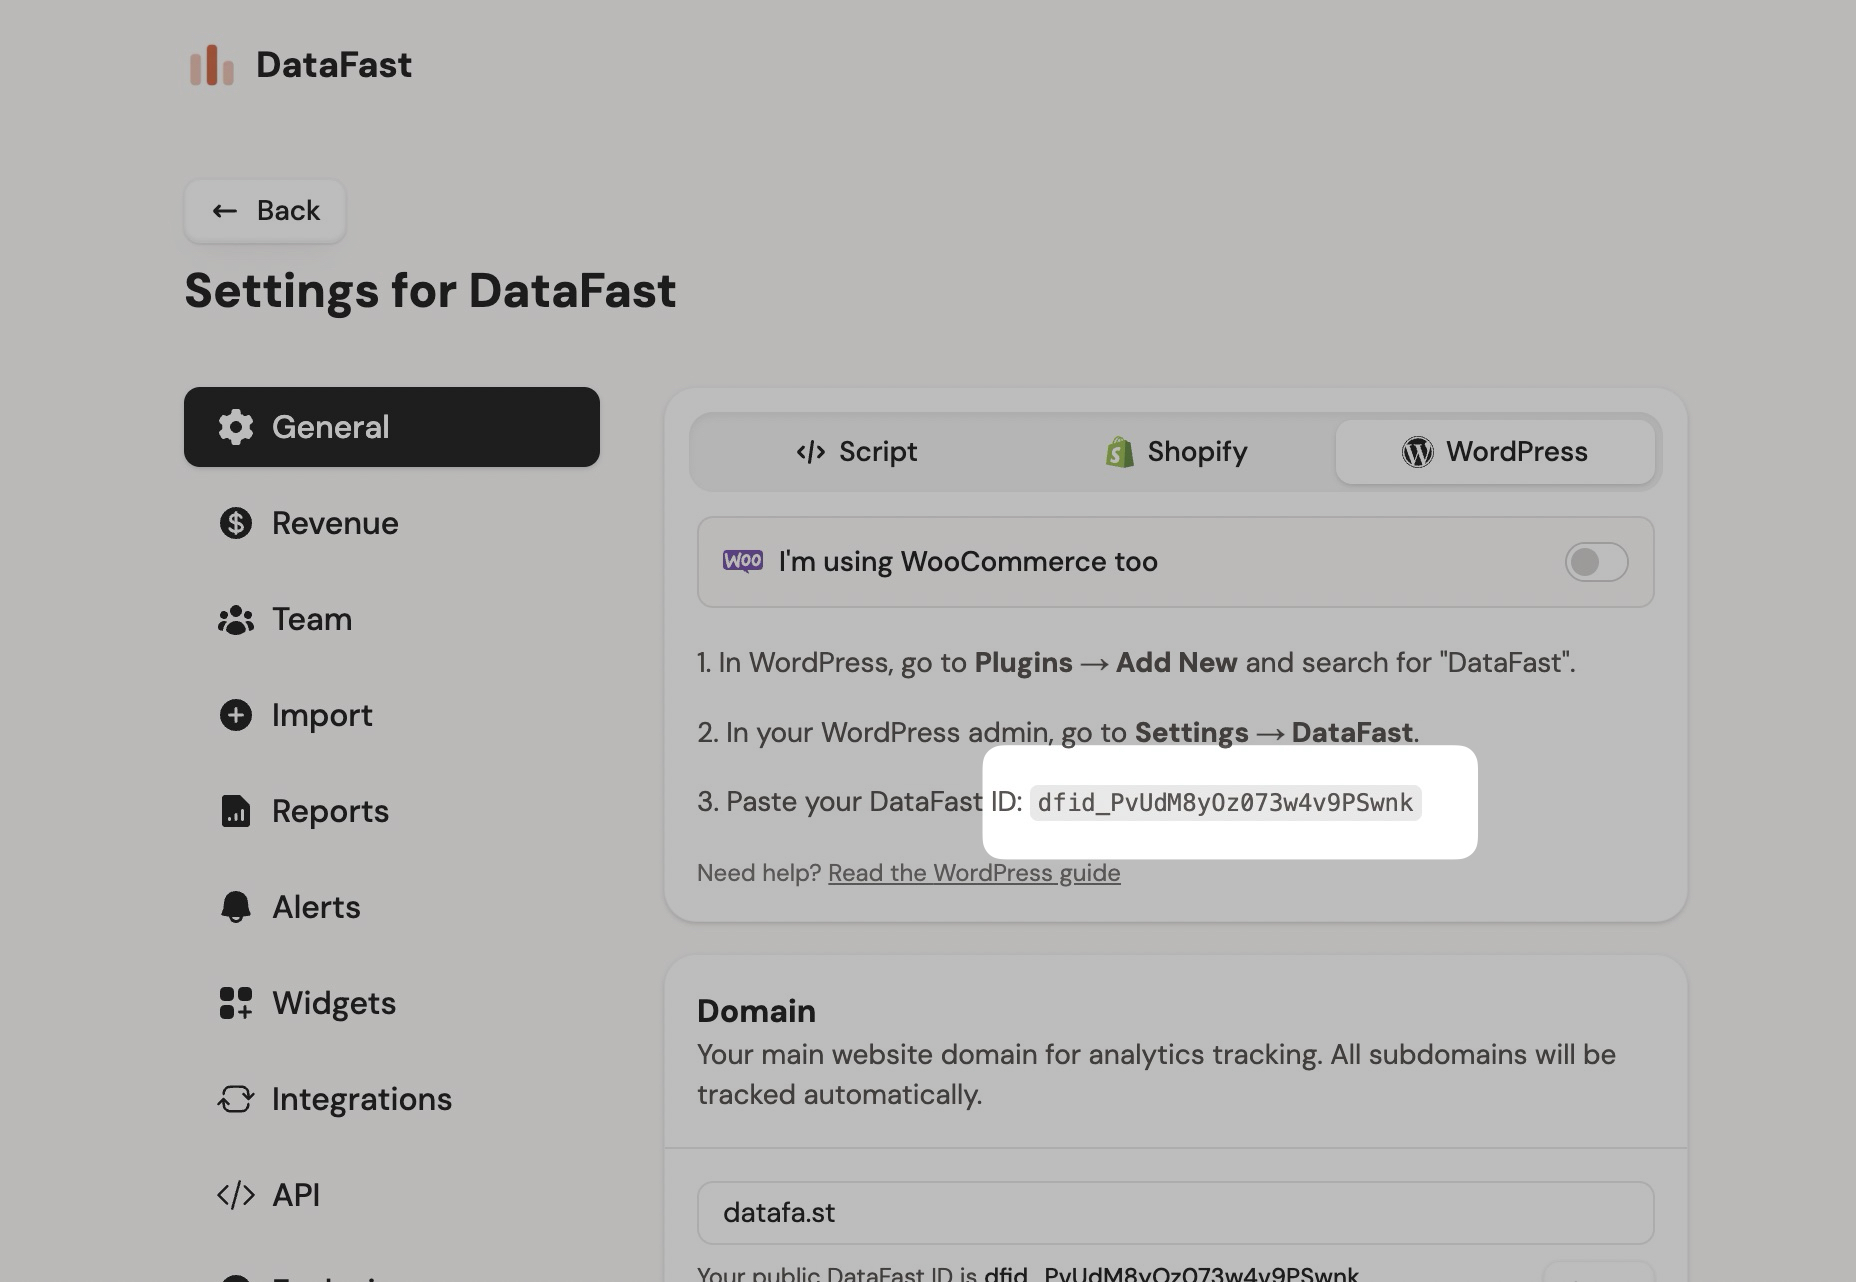
- Navigate to Plugins > Add, search for "DataFast" and install the plugin by contributor named "justshipit".

If you prefer, you can download and install the official DataFast plugin manually.
- Open the plugin settings page (under Settings > DataFast in the sidebar).
- Enter your DataFast ID (e.g.
dfid_******) from your DataFast website settings, then save.
After a few minutes, you should start seeing pageviews from your WordPress site in your DataFast dashboard.
Method 2: Manually adding the script (Advanced)
-
In your WordPress admin dashboard, go to Appearance > Theme File Editor.
-
Select your active theme.
-
Find and open the
header.phpfile (Theme Header). -
Paste your DataFast tracking script just before the closing
</head>tag:<script defer data-website-id="dfid_******" data-domain="your_domain.com" src="https://datafa.st/js/script.js" ></script>Replacedfid_******with your actual Website ID from DataFast. Replaceyour_domain.comwith your website's root domain. -
Click Update File.
Verify installation
After implementing either method:
- Visit your live website.
- Check your DataFast dashboard for incoming data. It might take a few minutes for the first pageviews to appear.
For advanced configuration options like localhost tracking, custom API endpoints, or cross-domain setup, see the script configuration reference.