Track custom user actions (Goals)
DataFast allows you to track specific user actions beyond pageviews, known as Goal (signup, newsletter subscribe, checkout initiated, etc.).
- This helps you understand what visitors do
- Unlock the Journey feature
- Improve the revenue predictions and conversion funnels
You can track goals using three methods:
Method #1: Client-side tracking with JavaScript
datafast() function and pass the name of your goal goal_name.Add the JavaScript snippet where the conversion occurs (e.g., on a "thank you" page after signup, when a user clicks a button, etc.).
window?.datafast("signup");
Rules for goal_name:
- Use lowercase letters.
- Numbers, underscores (_), hyphens (-), and colons (:) are allowed.
- Maximum 64 characters.
Advanced usage with custom parameters
window?.datafast("initiate_checkout", {
  name: "Elon Musk",
  email: "elon@x.com",
  product_id: "prod_123",
});
Rules for custom parameters:
- Property names: lowercase letters, numbers, underscores (_), and hyphens (-) only. Max 64 characters.
- Property values: any string, max 255 characters.
- Limits: maximum 10 custom parameters per event.
Ensure reliable tracking (recommended)
<head> to guarantee events are captured even when triggered before the main script loads:<script id="datafast-queue">
window.datafast = window.datafast || function() {
window.datafast.q = window.datafast.q || [];
window.datafast.q.push(arguments);
};
</script>
Method #2: Client-side tracking with HTML data attributes
data-fast-goal attribute. This is the simplest way to track button clicks.<button data-fast-goal="initiate_checkout">Buy Now</button>
initiate_checkout.Advanced usage with custom parameters
data-fast-goal-* attributes to include custom parameters:<button
data-fast-goal="initiate_checkout"
data-fast-goal-price="49"
data-fast-goal-currency="USD"
data-fast-goal-plan-type="pro">
Subscribe to Pro Plan
</button>
initiate_checkout and { price: '49', currency: 'USD' plan_type: 'pro' } custom parameters.Rules for data attribute values:
- Goal names: same as JavaScript method (lowercase letters, numbers, underscores (_), hyphens (-), and colons (:) only, max 64 characters)
- Parameter names: extracted from attribute name and converted from kebab-case to snake_case (e.g.,
data-fast-goal-product-id→product_id) - Parameter values: any string, max 255 characters (automatically sanitized)
- Maximum 10 custom parameters per event (same as JavaScript method)
Ensure reliable tracking (recommended)
<head> to guarantee events are captured even when triggered before the main script loads:<script id="datafast-queue">
window.datafast = window.datafast || function() {
window.datafast.q = window.datafast.q || [];
window.datafast.q.push(arguments);
};
</script>
While easy to implement, client-side tracking might be less accurate due to ad blockers or network issues. For better reliability, use server-side tracking.
Method #3: Server-side tracking (most accurate)
- Get an API Key: Go to your Website Settings > API tab and create an API key to authenticate your requests.
- Send Goal data: Use the Goal API endpoint to send goal information from your backend whenever a user completes the desired action.
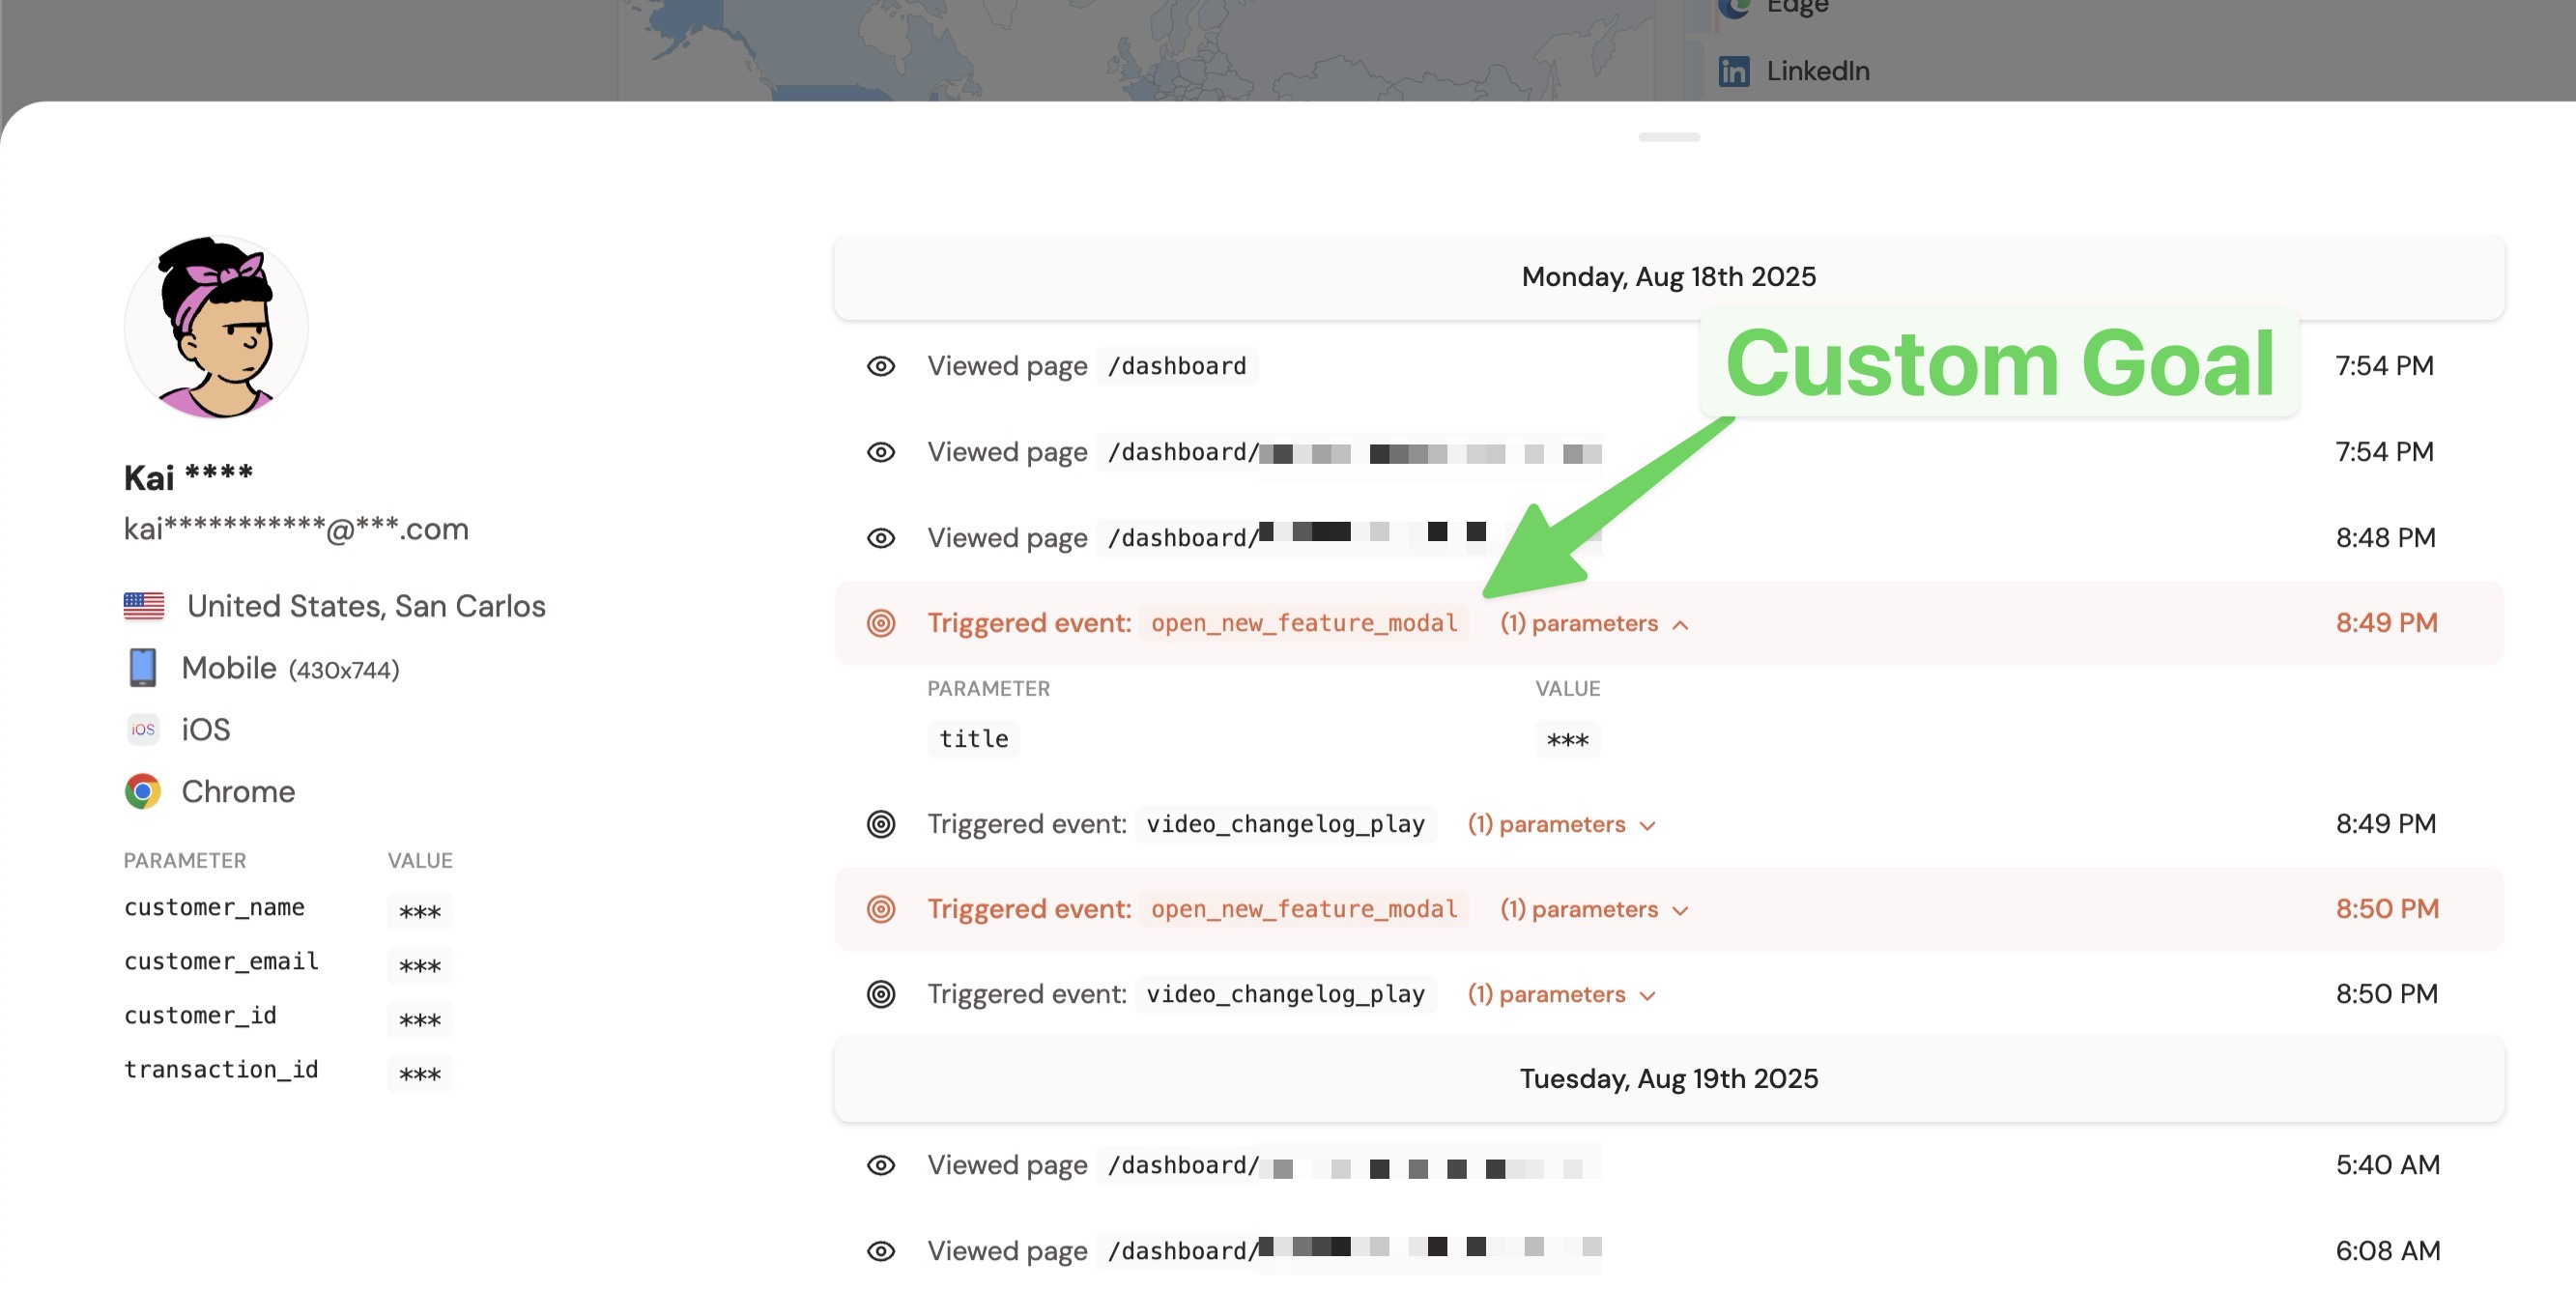
Viewing custom parameters in your dashboard
When you pass custom parameters to a goal (using any of the methods above), you can see them directly in your dashboard.
- Go to your analytics dashboard
- Open the Goals card
- Click a goal in the list, or click its line in the chart
- Expand any custom property in the side panel to see its values
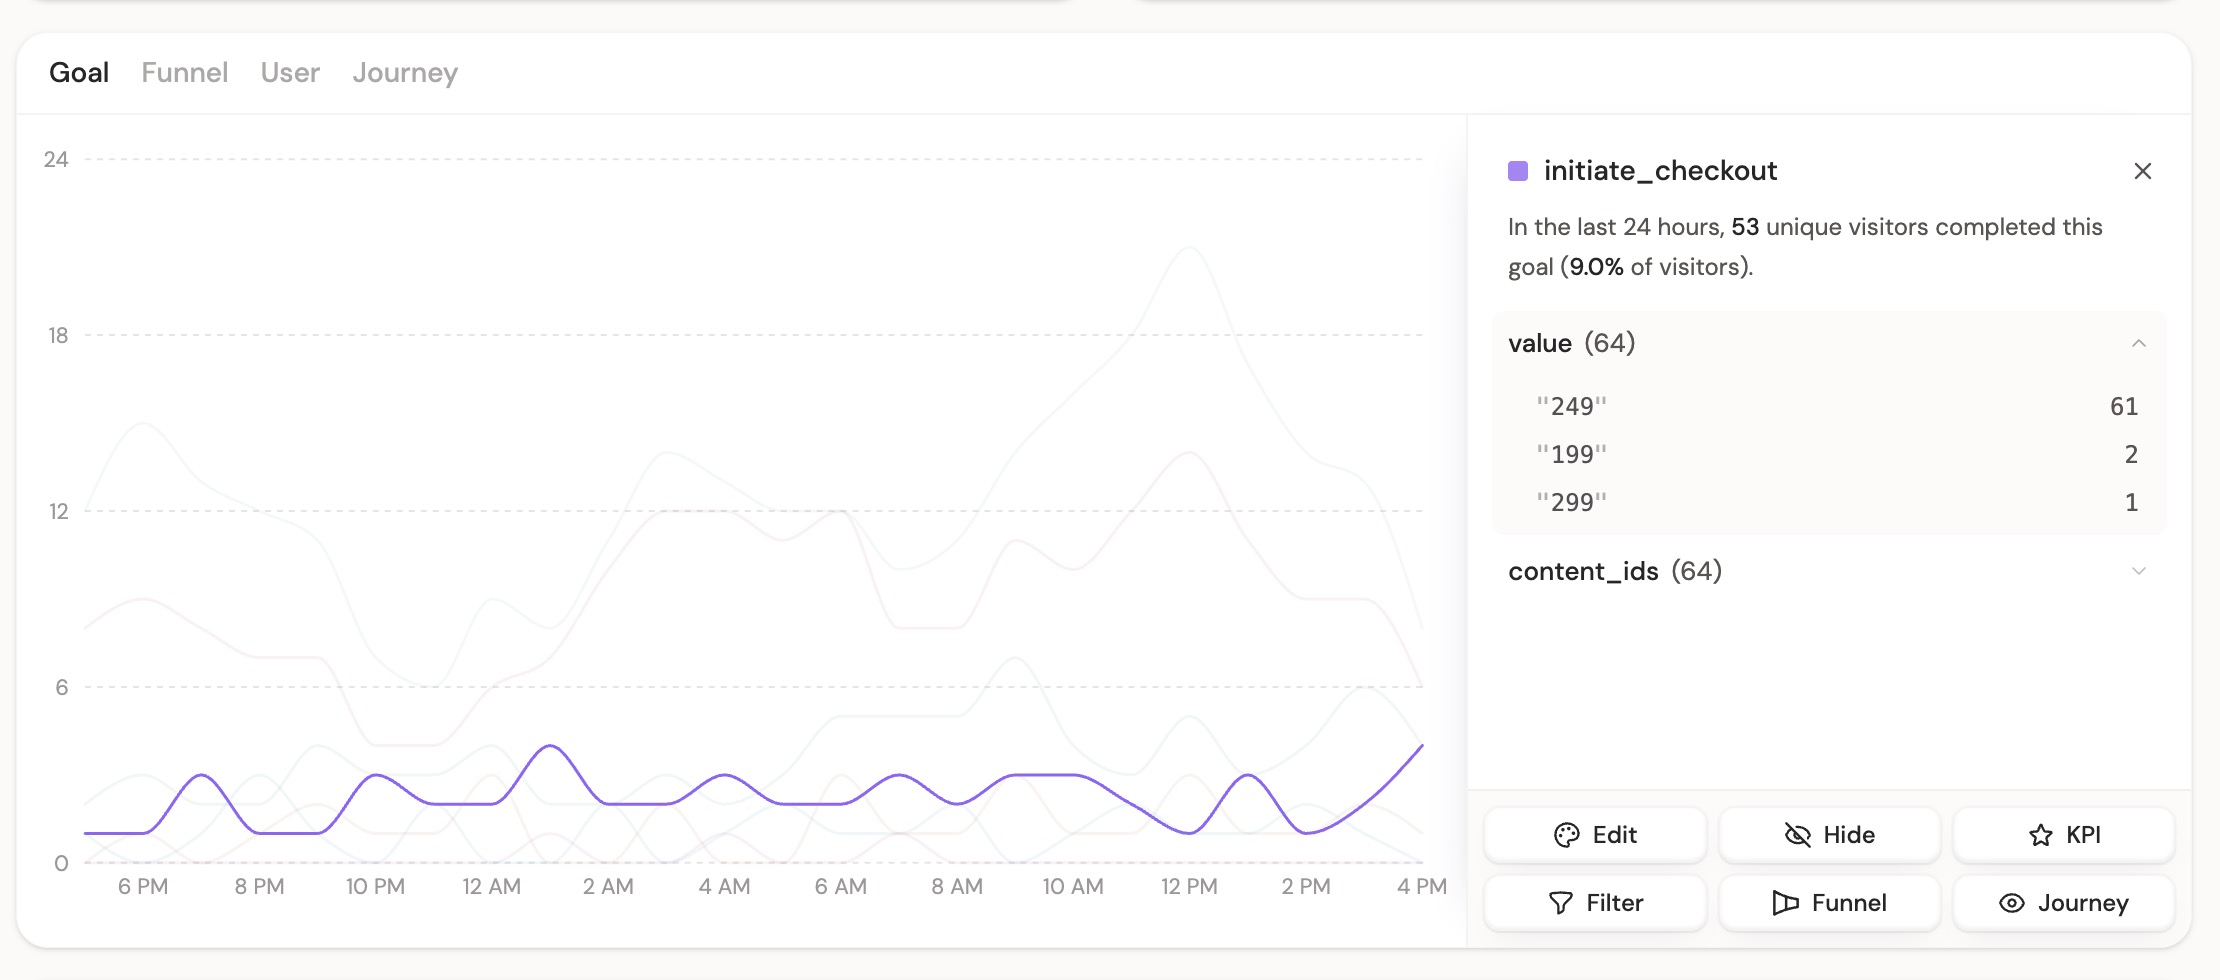
initiate_checkout goal with a plan parameter, you can expand plan to see how many visitors checked out on each plan (starter, pro, premium, etc.).This works with any custom parameter you pass — user emails, product names, plan types, currencies, or anything else you track.
Billing
Automatic payment-provider goals
These names are reserved. Do not send custom goals with the same names, or your custom events may be confused with payment-provider events.
Automatically tracked goal names
Generic payment events:
| Goal name | Meaning |
|---|---|
payment | A payment was completed. |
free_trial | A free trial was started or detected. |
Subscription lifecycle events:
| Goal name | Meaning |
|---|---|
trial_started | A subscription trial started. |
trial_converted | A trial converted to a paid subscription. |
subscription_started | A paid subscription started. |
subscription_upgraded | Subscription MRR increased. |
subscription_downgraded | Subscription MRR decreased. |
subscription_renewed | A subscription renewed. |
subscription_cancel_scheduled | A cancellation was scheduled for the end of the billing period. |
subscription_reactivated | A subscription was reactivated. |
subscription_ended | A subscription ended. This is the goal to use for churned customers. |
For example, to find visitors who churned today with the CLI:
datafast visitors list --completed-goal subscription_ended --period today
datafast visitors get <datafast_visitor_id>